The Ultimate Guide to Installing Engineered Wood Flooring

Engineered wood flooring combines the elegance of natural wood with enhanced stability and resistance to moisture. This makes it a top choice for homeowners looking to upgrade their flooring.
Engineered wood flooring consists of multiple layers of wood, with a top layer of genuine hardwood and underlying layers of plywood or high-density fiberboard (HDF). This construction makes engineered wood more stable than solid wood. It resists warping and expansion due to changes in temperature and humidity.
The top layer can vary in thickness, typically ranging from 1/16 to 1/4 inch. It can be sanded and refinished just like solid wood, although the number of times it can be refinished depends on the thickness of the top layer.
If you’re considering it for a home makeover and want to take on the installation yourself, this detailed guide will walk you through every step of the process. We will ensure a professional finish that will last for years. However, if you’re not convinced to choose it, let’s try again.
Why Choose Engineered Wood Flooring?
Engineered wood flooring offers several advantages.
- Stability: Its layered construction provides greater dimensional stability, reducing the likelihood of warping or cupping.
- Versatility: Suitable for basements and other areas where solid wood might not perform well due to moisture concerns.
- Installation Flexibility: Can be installed over various subfloors, including concrete, plywood, and existing floors.
- Aesthetic Variety: Available in a wide range of wood species, finishes, and plank sizes, allowing for a customized look.
Tools and Materials Needed
Before you start, make sure you have all the necessary tools and materials:
- Engineered wood flooring planks
- Underlayment (if required)
- Moisture barrier (for concrete subfloors)
- Tape measure
- Tapping block and pull bar
- Spacers
- Rubber mallet
- Circular saw, or miter saw
- Utility knife
- Adhesive (for glue-down method)
- Nails or staples (for nail-down method)
- Hammer
- Chalk line
- Vacuum or broom
- Level
Preparation Steps
Step 1: Acclimate the Flooring
Let the engineered wood planks acclimate in the installation area for at least 48 hours. This step is crucial as it allows the wood to adjust to the room’s temperature and humidity, preventing future expansion or contraction once installed.
Step 2: Prepare the Subfloor
A clean, dry, and level subfloor is essential for a successful installation:
- Concrete Subfloors: Check for moisture content and lay down a moisture barrier to prevent any dampness from affecting the wood.
- Wood Subfloors: Secure any loose boards, sand down high spots, and ensure the surface is smooth and even.
Step 3: Plan Your Layout
Decide on the direction you want the flooring to run. Running the planks parallel to the longest wall or towards the primary light source generally looks best. Use a chalk line to mark your starting line. Remember to leave an expansion gap (typically 1/4 inch) around the room’s perimeter to allow for the natural movement of the wood.
Installation Methods
There are three primary methods for installing engineered wood floors: floating, glue-down, and nail-down. The method you choose depends on the type of flooring and the subfloor.
Floating Installation
Step 1: Install Underlayment
If your engineered wood flooring doesn’t have a pre-attached underlayment, roll out the underlayment perpendicular to the direction of the flooring. Tape the seams together to create a continuous barrier.
Step 2: Lay the First Row
Place spacers along the walls to maintain the expansion gap. Lay the first row of planks with the tongue side facing the wall. Align the edges and click the planks together.
Step 3: Continue Laying Planks
Fit the next plank into the previous one at an angle and press down to click it into place. Use a tapping block and mallet to ensure a snug fit without damaging the planks.
Step 4: Cut the Final Row
Measure and cut the last row of planks to fit, remembering to leave the expansion gap. Use a pull bar to fit the previous planks tightly.
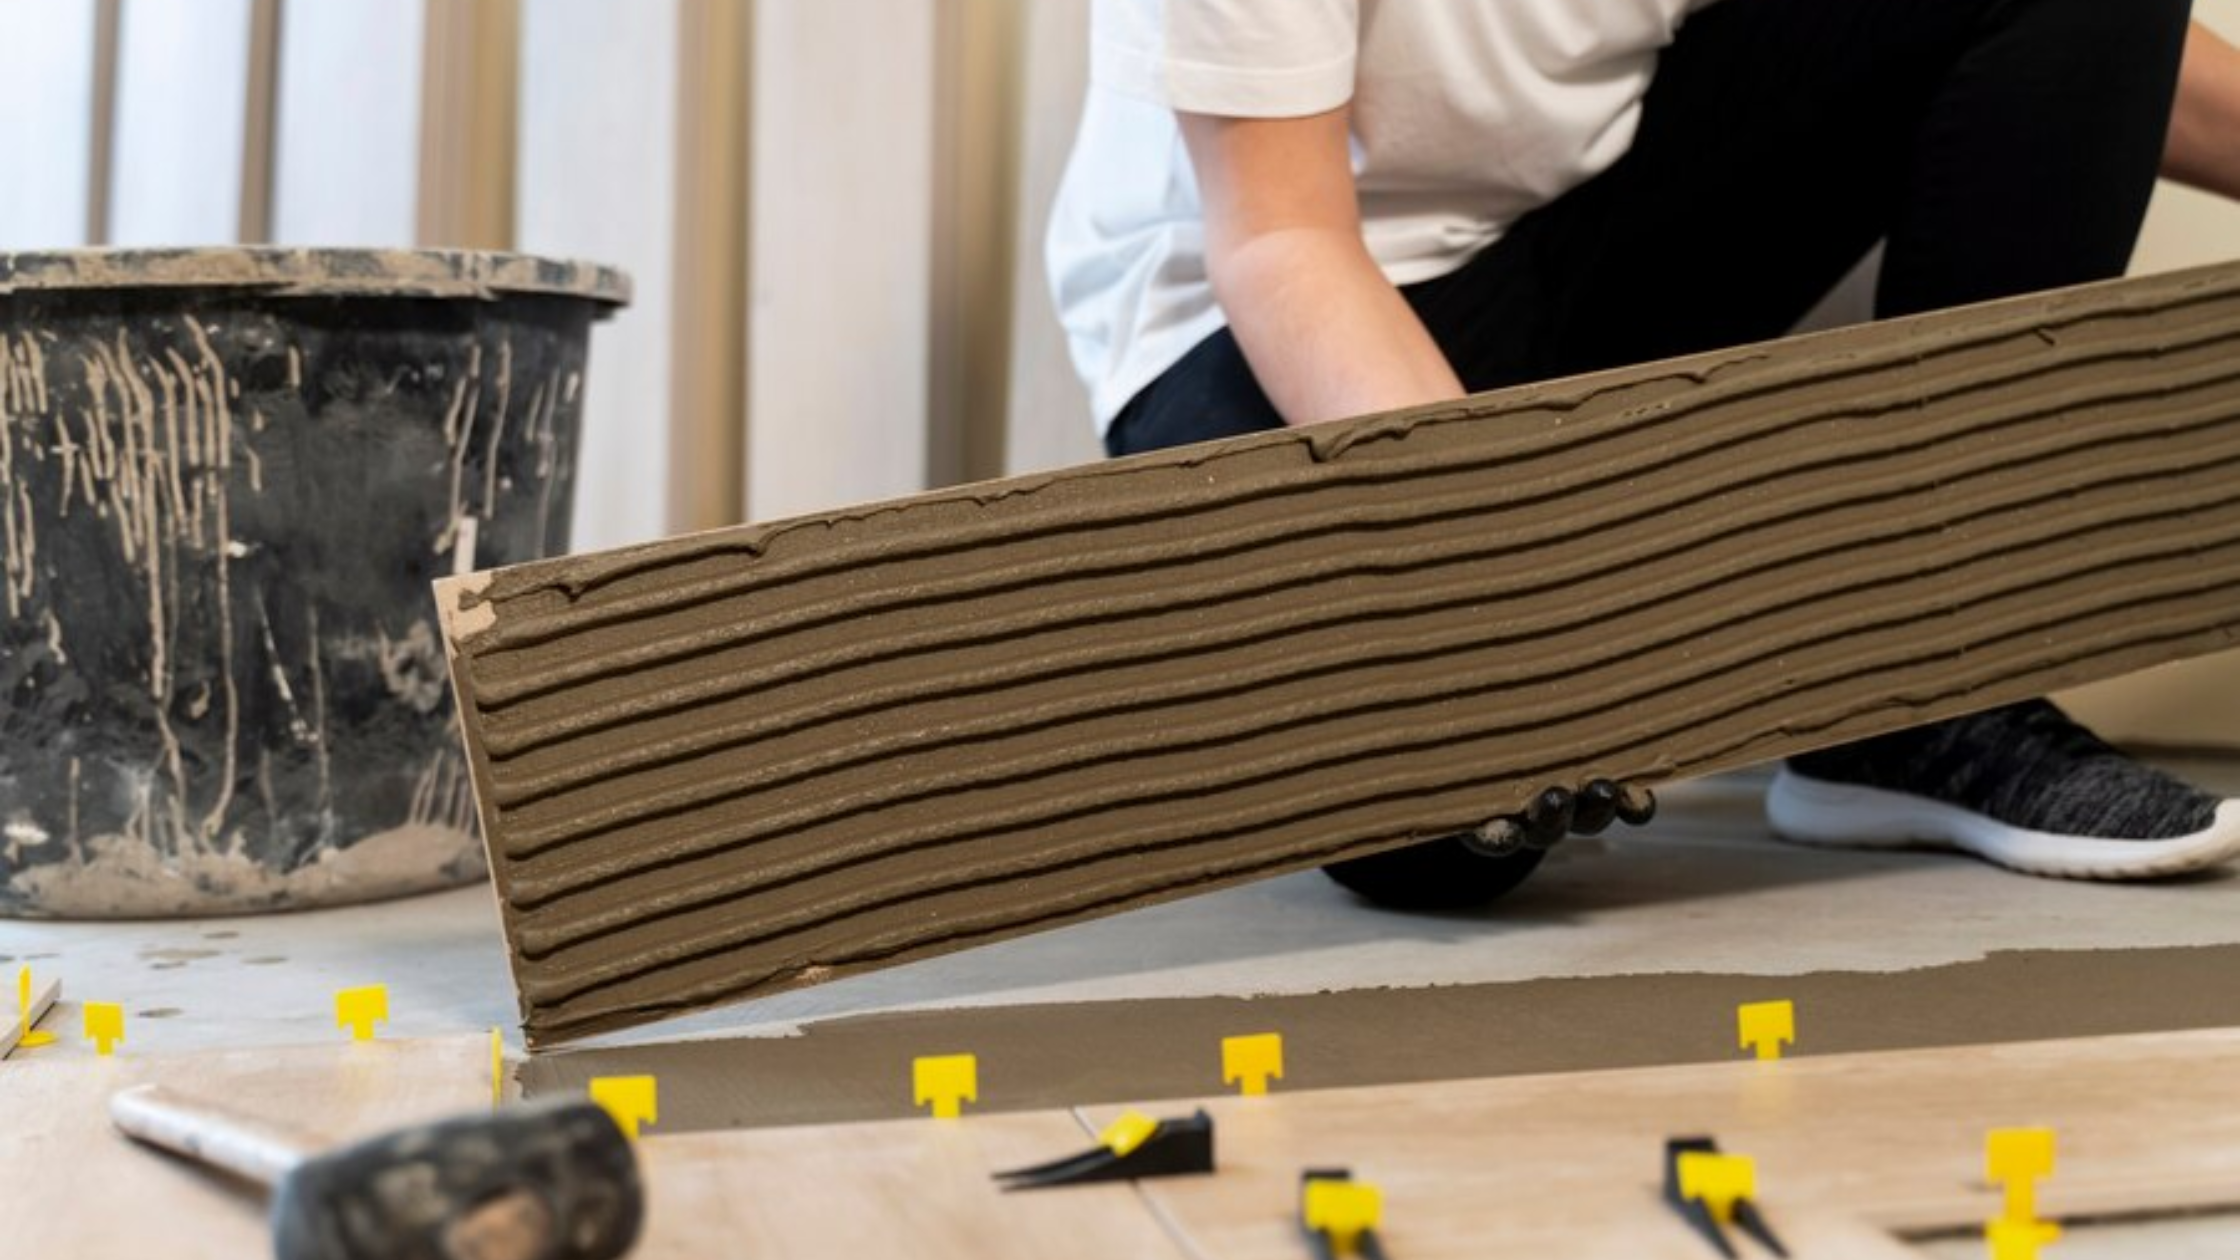
Glue-Down Installation
Step 1: Apply Adhesive
Using a trowel, spread the adhesive on the subfloor in small sections to prevent it from drying out before you lay the planks.
Step 2: Lay the Planks
Place the first row of planks into the adhesive, pressing them firmly. With spacers, maintain the expansion gap.
Step 3: Continue Laying Planks
Work row by row, spreading adhesive and laying planks. Use a tapping block to ensure the planks fit tightly together.
Step 4: Roll the Floor
Once all the planks are installed, roll the floor with a 100-pound roller to ensure proper adhesion and eliminate air pockets.
Nail-Down Installation
Step 1: Lay the Underlayment
If using underlayment, lay it down first to provide a cushioning layer and sound barrier.
Step 2: Position the First Row
Place the first row of planks along the starting line with the tongue side facing the wall. Pre-drill holes for the nails to prevent splitting the wood and nail the planks into the subfloor.
Step 3: Continue Nailing Planks
Stagger the joints by starting the second row with a shorter plank. Use a flooring nailer to secure each plank, ensuring they fit tightly together.
Step 4: Cut and Fit the Final Row
Measure and cut the last row to fit, maintaining the expansion gap. Use a pull bar to fit the final planks tightly.
Finishing Touches
- Install Baseboards and Trim: Once the flooring is complete, remove the spacers and install baseboards and trim to cover the expansion gaps, providing a clean, finished look.
- Clean the Floor: Vacuum or sweep the floor to remove any debris or sawdust that accumulated during installation.
- Allow the Floor to Settle: Let the floor settle for a few days before moving furniture back in to ensure the adhesive or nails are fully set.
Tips and Considerations
- Follow Manufacturer Instructions: To ensure the best results, always adhere to the specific guidelines provided by the flooring manufacturer.
- Climate Control: Maintain a consistent temperature and humidity level in your home to prevent the wood from expanding or contracting excessively.
- Invest in Quality Tools: High-quality tools can make the installation process smoother and more efficient, saving you time and reducing the risk of mistakes.
- Check for Levelness: Use a level to check your subfloor before installation. Uneven surfaces can lead to issues down the line, so address any dips or high spots beforehand.
Conclusion
Installing engineered wood flooring can significantly enhance the aesthetic and functional value of your home. With its durability, versatility, and beauty, engineered wood is a smart choice for any room. By following this guide and taking your time to prepare and install the flooring correctly, you’ll achieve a professional-looking finish that will be the envy of your friends and neighbors. Remember, patience and attention to detail are essential.
Recommended Posts

When to Sand vs When to Replace: A Decision Guide for Homeowners
October 17, 2025

5 Essentials to Know Before You Refinish Hardwood Floors
September 16, 2025

Easy Ways to Repair Hardwood Scratches and Dents
September 5, 2025