Mastering the Craft: A Comprehensive Guide to Hardwood Floor Installation
Embarking on the journey of hardwood floor installation is an exciting endeavor that can transform the aesthetic and ambiance of any space. Whether you’re a DIY enthusiast or considering professional installation, understanding the intricacies of the process is crucial for a successful and lasting result. In this comprehensive guide, we’ll delve into the step-by-step process of hardwood floor installation, ensuring a smooth and visually appealing outcome.
Preparation Phase: Setting the Foundation for Success
Before embarking on the actual installation of hardwood floors, meticulous preparation lays the groundwork for a successful and enduring result.
-
- Subfloor Inspection: The first crucial step in the preparation phase is a thorough inspection of the subfloor. This foundational layer must meet specific criteria to ensure a seamless hardwood floor installation. The subfloor should be clean, free of debris, and impeccably dry. Any irregularities or damage present on the subfloor must be identified and addressed before proceeding further. In cases where the hardwood floor is to be installed over a concrete subfloor, it’s paramount to verify that moisture levels fall within acceptable limits. Addressing subfloor issues at this stage is instrumental in preventing potential complications during and after installation.
-
- Acclimation of Hardwood: Once the subfloor is deemed suitable for installation, the next vital step is to allow the hardwood flooring material to acclimate to its future environment. This acclimation process typically spans a few days and is crucial for minimizing the risk of expansion or contraction post-installation. By exposing the hardwood planks to the temperature and humidity of the space where they will be installed, the wood can adjust gradually. This precautionary measure is essential to prevent issues such as warping or buckling, ensuring the hardwood adapts harmoniously to its surroundings.

Gathering Tools and Materials: Equipping for Success
With a well-prepared subfloor and acclimated hardwood, the next phase involves assembling the necessary tools and materials for a seamless hardwood floor installation.
-
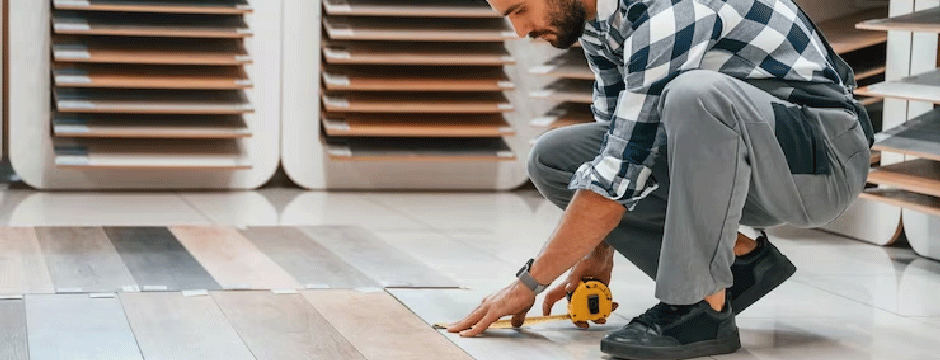
- Tools: Equipping yourself with the right tools is paramount to the efficiency and precision of the installation process. Essential tools include a miter saw for accurate cuts, a nail gun for secure attachment, a moisture meter to assess humidity levels, a tapping block for proper alignment, and a quality level to ensure a perfectly flat surface. Whether you choose to rent or purchase these tools, investing in high-quality equipment significantly contributes to the overall success of the installation.
-
- Materials: Alongside the hardwood flooring itself, a comprehensive list of materials is essential for a smooth installation process. Underlayment, which provides additional insulation and moisture protection, is a critical component. If opting for engineered hardwood, adhesive becomes a necessary material for securing the planks. Nails or staples are required for the attachment process, while wood filler addresses gaps and imperfections. Finish products, such as polyurethane, are utilized to seal the hardwood, providing protection and a polished appearance. Gathering these materials beforehand ensures a seamless workflow during the installation process.
Installation Techniques: Navigating the Process
With the groundwork laid in the preparation phase, the installation of hardwood floors unfolds as a precise and detail-oriented process.
-
- Choosing the Right Installation Method: The first decision in the installation process revolves around selecting the appropriate method based on the type of hardwood chosen. Engineered hardwood typically lends itself to glue-down or floating installations due to its construction. In contrast, solid hardwood offers the flexibility of being nailed, stapled, or glued down. The choice of installation method depends on factors such as the subfloor type, the environment, and personal preferences.
-
- Establishing a Starting Point: Identifying the starting point for installation is a critical consideration. Determine the focal point of the room or the direction of the primary light source. While a general guideline suggests starting along the longest straight wall, room specifics may necessitate variations. This careful selection of the starting point sets the tone for the entire installation, ensuring a visually appealing and harmonious outcome.
-
- Laying the First Rows: With the starting point established, commence laying the first rows of hardwood planks. Precision is paramount at this stage, ensuring that the planks are not only straight but also parallel to the starting wall. Additionally, leaving expansion gaps around the perimeter of the room is essential. These gaps accommodate the natural expansion and contraction of the wood, preventing issues such as buckling or warping over time.
-
- Nailing or Stapling: If employing the nail-down or staple-down method, secure the hardwood planks to the subfloor at a slight angle. This ensures a snug fit between each plank, creating a secure and stable foundation. The process demands attention to detail, with each nail or staple contributing to the overall structural integrity of the floor.
-
- Glue-Down Installation: In cases where a glue-down installation is chosen, the subfloor is coated with adhesive using the recommended trowel size. Each hardwood plank is then carefully placed, adhering to the desired pattern and alignment. This method provides a strong bond between the wood and the subfloor, contributing to a solid and durable installation.
-
- Floating Installation: A floating installation involves connecting the hardwood planks to each other rather than attaching them to the subfloor. An underlayment is typically employed to provide cushioning and reduce noise. This method is advantageous in spaces where a certain degree of flexibility is desired, and it simplifies the installation process.
Finishing Touches: Sealing the Deal with Precision
Once the majority of the hardwood flooring is in place, the focus shifts to the final touches that enhance both the appearance and longevity of the floor.
-
- Trimming and Cutting: Use a miter saw to make precise cuts for the final rows of hardwood planks, ensuring a seamless fit against walls and obstacles. This step is crucial for achieving a polished and professional look, with each plank seamlessly integrating with its surroundings.
-
- Filling Gaps and Holes: Address any gaps or holes between planks by applying wood filler. This not only contributes to the visual cohesion of the floor but also serves a functional purpose. Sand the entire floor to create a smooth surface, removing any imperfections and providing the ideal canvas for subsequent finishing.
-
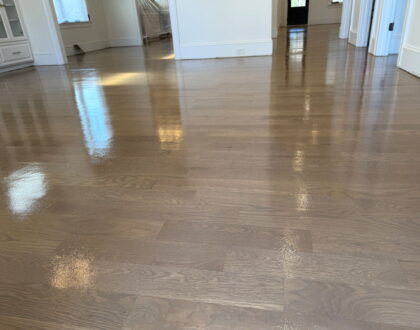
- Sealing and Protecting: To safeguard the hardwood floor from wear, moisture, and scratches, seal it with a high-quality polyurethane finish. The selection of the finish should align with the desired level of sheen, offering both aesthetic appeal and practical protection. This final step enhances the longevity of the hardwood floor, ensuring it retains its beauty and integrity over time.
Maintenance Tips: Ensuring Longevity and Beauty
While the installation of hardwood floors is a transformative process, the key to preserving their beauty and longevity lies in consistent and proper maintenance practices. Implementing a well-rounded maintenance routine is essential to safeguard your investment and keep your hardwood floors looking pristine.
-
- Regular Cleaning: The cornerstone of hardwood floor maintenance is regular cleaning. Sweep or vacuum the floors regularly to remove dirt, dust, and debris that can accumulate over time. Using a soft-bristle broom or a vacuum with a hardwood floor attachment helps prevent scratches. For a deeper clean, use a damp mop, ensuring that it is not excessively wet. Excessive water can seep into the wood, causing damage such as warping or cupping. Opt for specialized hardwood floor cleaners or a solution of mild soap and water to maintain the floor’s finish while effectively removing grime.
-
- Avoiding Moisture Damage: Hardwood floors are particularly sensitive to moisture, making it crucial to prevent water damage. Promptly wipe up spills using a soft, absorbent cloth to prevent liquids from penetrating the wood. High-moisture areas, such as kitchens and bathrooms, should be equipped with area rugs or mats to minimize the risk of water exposure. Additionally, maintaining a consistent indoor humidity level is essential. Fluctuations in humidity can lead to wood expansion or contraction, potentially causing gaps or warping. Using a humidifier or dehumidifier as needed helps regulate indoor humidity levels and provides a stable environment for your hardwood floors.
-
- Protecting from Furniture: Furniture can pose a threat to the pristine surface of hardwood floors, but preventative measures can mitigate potential damage. Place protective pads or felt under furniture legs to create a buffer between the heavy items and the floor. This simple yet effective step prevents scratches and dents caused by the movement or weight of furniture. When rearranging or moving furniture, avoid dragging it across the floor. Lift and place furniture carefully to prevent abrasions that could mar the hardwood’s surface.

Conclusion:
Mastering the process of hardwood floor installation is both an art and a science. By meticulously following each step, from preparation to the finishing touches, you can achieve a beautiful and durable hardwood floor that enhances the overall aesthetic of your space. Whether you choose to embark on a DIY project or enlist the help of professionals, understanding the nuances of hardwood floor installation ensures a result that stands the test of time.
To find out more, visit us at Majestic Hardwood Floors!
Read More Articles visit here: Sustainable Flooring Options for Eco-Friendly Homes in Charlotte