Step-by-Step Guide: How to Refinish Hardwood Floors Like a Pro
Refinishing hardwood floors is a transformative and rewarding DIY project that can breathe new life into your home’s interior. Whether you want to restore the original beauty of your hardwood floors or give them a fresh, updated look, refinishing is the way to go. In this comprehensive guide, we’ll take you through the step-by-step process of how to refinish hardwood floors like a pro. From preparation to finishing touches, we’ll cover everything you need to know to achieve stunning results that will leave your floors looking brand new.
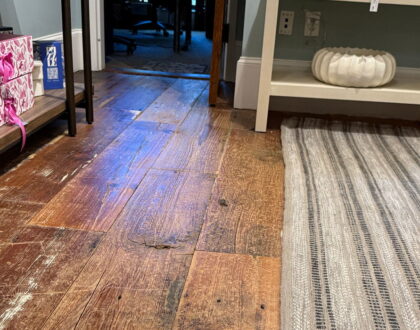
Step 1: Evaluate Your Floors
Before diving into the refinishing process, take a close look at your hardwood floors. Assess the condition of the wood, looking for signs of damage, scratches, or deep stains. Minor surface imperfections can usually be addressed during refinishing, but severe damage may require professional assistance or replacement of damaged boards.

Step 2: Gather the Right Tools and Materials
If you want to know how to refinish hardwood floors successfully, you’ll need the following tools and materials:
- Safety gear (dust mask, safety goggles, and gloves)
- Drum or orbital sander
- Edger sander
- Sandpaper (coarse, medium, and fine grit)
- Wood filler
- Floor buffer
- Vacuum cleaner
- Tack cloth
- Stain (optional)
- Polyurethane sealer
Step 3: Clear the Room and Prep the Area
Start by clearing the room of all furniture and rugs. This will give you ample space to work and protect your belongings from dust and debris. Remove any baseboards, shoe moldings, or door thresholds to access the edges of the floor.
Step 4: Sanding – The Key to a Smooth Surface
Sanding is a critical step in hardwood floor refinishing, as it removes old finishes, scratches, and unevenness, leaving you with a smooth and even surface. Begin sanding with a coarse grit sandpaper, moving in the direction of the wood grain. For larger areas, use a drum sander, and for corners and edges, switch to an edger sander.
Step 5: Fill Gaps and Imperfections
After sanding, inspect the floor for gaps, cracks, or nail holes. Use wood filler to fill these imperfections, ensuring a seamless and uniform surface. Allow the filler to dry completely before proceeding to the next step.
Step 6: Sanding with Medium and Fine Grit
Once the wood filler is dry, switch to medium grit sandpaper and sand the entire floor again, followed by fine grit sandpaper. Remember, sanding and refinishing hardwood floors is a crucial aspect. This step further smoothens the surface and prepares it for staining or sealing.
Step 7: Clean Thoroughly
Remove all sanding dust and debris from the floor and surrounding area using a vacuum cleaner and tack cloth. A clean surface is crucial to achieve a professional finish.
Step 8: Stain (Optional)
If you desire a different color or want to enhance the natural beauty of the wood, now is the time to apply the stain. Test the stain on a small, inconspicuous area of the floor to ensure you achieve the desired color. Apply the stain evenly with a brush or cloth, following the wood grain. Allow the stain to dry according to the manufacturer’s instructions.
Step 9: Apply the Polyurethane Sealer
The final step in refinishing hardwood floors is sealing the surface with polyurethane. Polyurethane provides durability and protection against wear, spills, and scratches. Choose between oil-based or water-based polyurethane, keeping in mind that water-based options dry faster and have a lower odor. Use a floor buffer fitted with a clean pad to apply the polyurethane in smooth, even strokes. Allow the first coat to dry completely before applying additional coats, usually two to three coats are recommended.
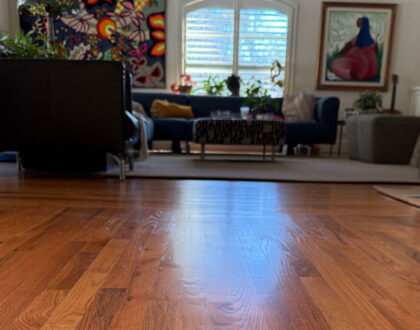
Step 10: Allow the Floors to Cure
After the final coat of polyurethane, give your refinished hardwood floors ample time to cure. Avoid placing furniture or rugs on the floors for at least 48 hours to prevent any damage to the finish.
Wrapping Up
Refinishing hardwood floors is a labor-intensive but highly rewarding DIY project that can transform your living space. With proper preparation, the right tools, and attention to detail, you can achieve professional-quality results that will leave your floors looking as good as new. Remember to follow each step carefully, taking the time to sand, fill, and apply finishes meticulously. Embrace the sense of accomplishment that comes with refinishing your hardwood floors and enjoy the beauty they bring to your home for years to come. We hope this blog was able to offer valuable tips on how to refinish hardwood floors. Happy refinishing!
To find out more, visit us at Majestic Hardwood Floors!